


A complete Guide on How To Store Your Mower For Winter
How to Store Your Riding Lawn Mower in the Winter: A Complete Guide
Winter is coming — and so is the snow. As temperatures drop and leaves change color, it’s the perfect time to think ahead and prepare your riding lawn mower for winter storage. By winterizing your riding lawn mower now, you’ll save yourself time, frustration, and potential costly repairs when spring rolls back around. In this guide, we’ll cover step-by-step instructions on how to store your mower properly, plus share helpful resources, related blog links, and even some recommended videos from our YouTube channel to make the process easier.

Why Winterize Your Riding Lawn Mower?
Leaving your mower with old fuel, dirty blades, or worn parts over the winter can cause damage, reduce efficiency, and shorten its lifespan. Proper winter storage ensures:
- Easy startup in spring
- Longer engine life
- Sharper blades and cleaner cuts
- Lower repair costs
For more year-round maintenance tips, check out our blog on
Quick Steps to your best lawn.
Step-by-Step Guide to Winterize Your Riding Lawn Mower
1. Pre-Prep: Set Yourself Up for Success
- Park the
mower on a flat, level surface.
- Make sure the engine is turned off and cool.
- Gather tools: most steps can be done with a basic mechanic’s tool kit, but specialty tools like the Arnold Siphon Pump, Blade Removal Kit, and Blade Sharpening Kit make things easier.
2. Disconnect and Remove the Battery
- Remove the red positive (+) cable first, then the black negative (–).
- Carefully remove the battery and store it in a
warm, dry, ventilated location.
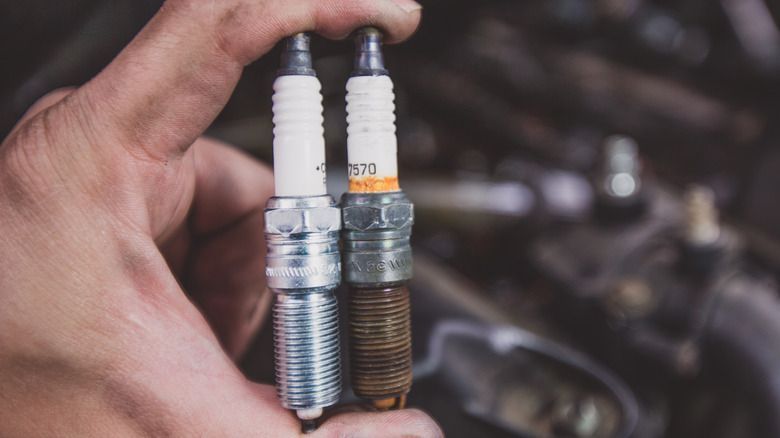
3. Check and Replace Spark Plugs
- Remove and inspect the
spark plug.
- Replace if worn or damaged. (Check your Operator’s Manual for the correct part number.)
Want to learn more about small engine care? Read our blog:
What ethanol gas is really doing to your engine.
4. Change the Oil and Replace the Filter
- Clean the oil fill and drain area.
- Use the Arnold Siphon Pump to remove old oil.
- Replace the
oil filter, lubricating the gasket of the new filter.
- Add fresh oil (per your Operator’s Manual).
5. Replace and Clean the Air Filter
- Remove the air cleaner cover.
- Wash the foam element in mild detergent and water, then let it dry.
- Lightly oil the foam element before reinserting.
Replace the paper element with a new one.
6. Replace Blades and Clean the Mowing Deck
- Clean dirt and grass from the undercarriage.
- Inspect blades for wear and replace or sharpen as needed.
- Use gloves and the Blade Removal Tool for safety.
For more blade care tips, check out:
How to Sharpen and Balance Mower Blades.
7. Inspect for Broken or Worn Parts
- Check
belts, belt covers, discharge chute, deck wheels, and tires.
- Replace any worn or missing parts.
8. Prepare the Fuel Tank for Storage
- Add a
fuel stabilizer to prevent fuel from spoiling.
- Run the engine for a few minutes to circulate the stabilizer.
For fuel storage tips, read:
What Ethanol Gas Is Really Doing To Your Engine.
Final Thoughts
Taking the time to properly winterize your riding lawn mower ensures that come spring, your equipment is ready to fire up without a hitch. By following these steps — and supplementing with helpful tools, blogs, and video guides — you’ll protect your investment and keep your mower in peak condition for years to come.
And don’t forget to explore more seasonal lawn care tips on the MD Enterprises Blog.
Ready to winterize your mower? Follow this checklist today and enjoy a smooth start next spring!
Share Our Blog Post(s) However You'd Like!
Contact
Contact Us